A test charge serves two important purposes:
-
Verifies your setup – Confirms that your payment configuration is complete and functioning correctly.
- Prepares payout timing – The first transaction processed through Opus1 Payments may take longer than usual to prepare for payout. Completing a test charge ensures that your first real billing cycle follows the standard T+2 timeline (transaction date + 2 business days) for businesses in the United States, or T+3 timeline for international businesses.
Steps to run a test charge
-
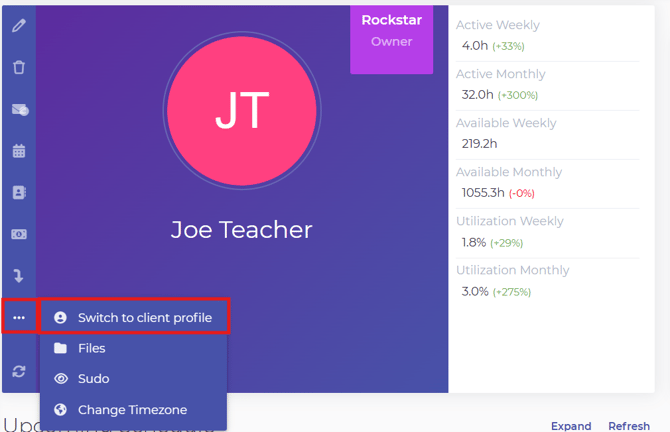
Navigate to a staff profile.
-
Click the three dots (⋯) and select “Switch to Client Profile.”
-
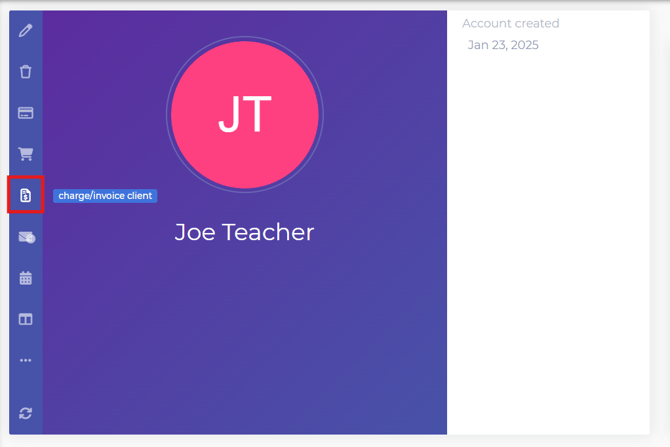
In the blue menu, click the “Charge/Invoice Client” icon.
-
On the Charge Client page, complete the required fields.
A charge amount of $1 is sufficient for testing.
-
Proceed with the charge by clicking “Process Charge” after filling out the fields.
Important notes
- Allow the charge to fully process.
- Do not void, refund, or modify the transaction after submitting it.
Running this test ensures a smooth transition to Opus1 Payments and helps avoid delays with your first scheduled payouts.